Now that you have acquired some knowledge about the
most important server-side networking considerations, it’s time to learn
how to install and configure the client-side half of the equation.
Installation Requirements
All SQL Server 2008
installations (including client-tools-only or SNAC-only installations)
require Windows Installer 4.5, which is freely downloadable from
Microsoft. It can also be installed as part of the SQL Server
Installation Wizard or manually installed from the SQL Server media. The
location of the installer media varies depending on the media you are
using but an example of the location is as follows:
D:\English\SQL2008\Enterprise\X86\redist\Windows Installer\x86
The same operating
system requirements for server installations apply to client tools and
SNAC installations, with one exception: When you install SNAC by itself
on top of Windows XP, only SP1 is required, and when you install SNAC on
top of Windows Server 2003, SP1 is not required.
Note that SNAC and the
client tools both depend on the presence of the .NET Framework 3.5 SP1,
and the client tools in turn depend on SNAC. Setup automatically
installs both Framework 3.5 SP1 and SNAC, when required, on the target
machine. If incompatible or beta versions exist that must be uninstalled
first, Setup lets you know to use Installer 4.5.
Installing the Client Tools
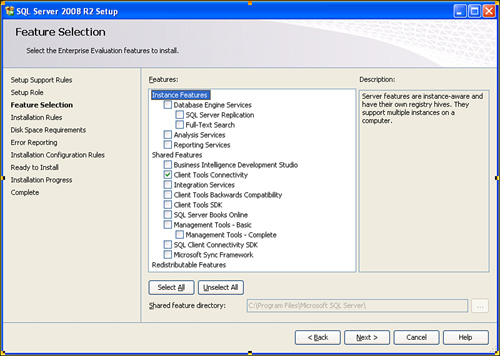
To install the SQL Server 2008 client tools, you start Setup normally . When the Feature Selection screen appears, you check only the Client Tools Connectivity check box, as shown in Figure 1.
The
same kind of install can be done quietly from the command line (Setup
doubles as a command-line application), using the following:
driveletter:\Servers\Setup> Setup.exe /q /ACTION=Install /FEATURES=CONN
 /INSTANCENAME=INST2008
That’s all there is to it!
You will be happy to learn
that the SQL Server 2008 client tools can safely be installed side by
side with your SQL Server 2000 or 2005 client tools. You can even access
databases and other objects created in either edition (with a few
notable exceptions, such as database diagrams) by using either toolset.
The sections that follow describe how to install and use a few of the client tools for client configuration and testing.
Installing SNAC
This section shows how easy it is to install SNAC, the key net-library for SQL Server 2008 and beyond.
As mentioned earlier, both the
SQL Server 2008 Database Engine and the client tools depend on SNAC.
SNAC is installed when you install the SQL Server connectivity tools, or
you can simply launch it on its own from the SQL Server installation
medium by running driveletter:\Servers\Setup\sqlncli.msi.
Table 1 describes the files that the Microsoft Installer (MSI) package installs.
Table 1. Files Installed by the SNAC MSI Package
| Filename | Purpose | Installed To |
|---|
| Sqlncli.h | C++ header file (replaces sqloledb.h) | Program Files\Microsoft SQL Server\100\SDK |
| sqlncli10.lib | C++ library file for calling BCP functions (replaces odbcbcp.lib) | Program Files\Microsoft SQL Server\100\SDK |
| sqlncli10.dll | Main library, containing both the ODBC driver and OLE DB provider (houses all functionality) | WINDIR\system32 |
| sqlnclir10.rll | Resource file | WINDIR\system32 |
| s10ch_sqlncli.chm | Compiled help file for creating data sources using SNAC | WINDIR\system32 |
Tip
For detailed information on how
to write C++ code by using the header and library files included in the
SNAC software development kit (SDK), see the Books Online topic “Using
the SQL Native Client Header and Library Files.”
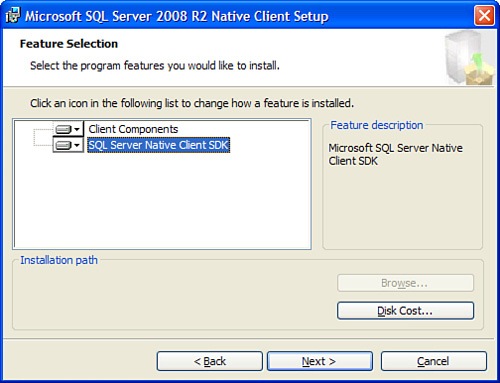
The SNAC installer has two primary options (shown in Figure 2):
Note
By default, all network protocols except for VIA are enabled on the client during installation.
That’s all there is to installing SNAC!
Redistributing SNAC with Custom Client Applications
If you build an application that relies on SNAC, you need to be aware that it can be redistributed in two ways:
When you are building MSI files for an application, it is important that you register sqlncli.msi
as a package dependency (and, of course, to install it as well, if it
is not present on the destination machine). This helps ensure that SNAC
will not be accidentally uninstalled from the destination machine
without first flashing a warning to users, indicating that any
application that relies on it will break. To do this, you execute the
following command early in your application’s installation process:
msiexec /i sqlncli.msi APPGUID={unique identifier for your product}
Note
The program name for SNAC found
in the Add or Remove Programs Control Panel applet is Microsoft SQL
Server 2008 Native Client, not SQL Native Client, as it is commonly
known.